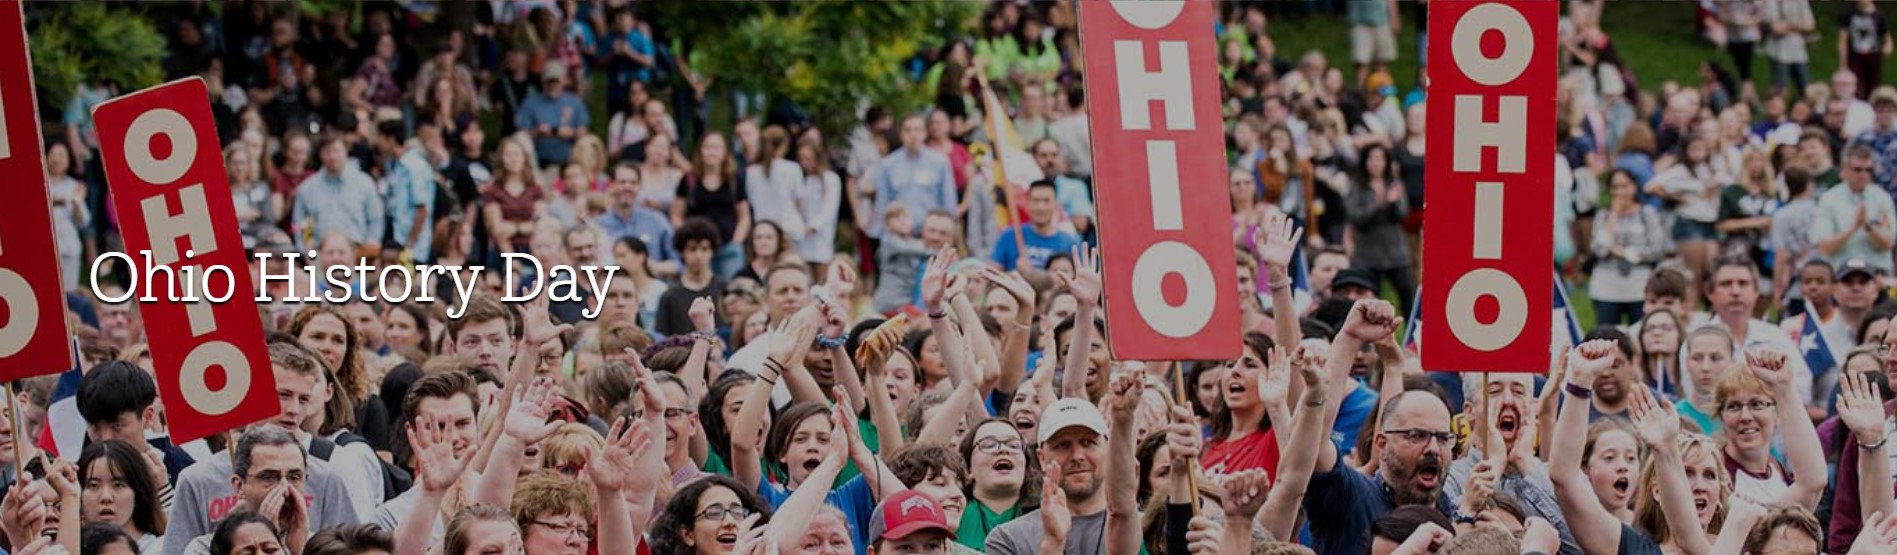
Ohio History Day is an affiliate of National History Day, a free interdisciplinary and project-based learning program that meets Ohio’s Learning Standards and allows students of all abilities to tell the stories that inspire them.
Are you interested in creating a documentary video for your History Day project? The resources below are designed to help you through the process of gathering resources, organizing your sources, editing your video, and polishing it for your History Day audience:
Assessing the Story
Gathering Resources
Presenting Your Argument
Scripting and Story Boarding
Design Decisions
Editing and Revising
Next Steps
The first thing you must do is select a story to feature in your history documentary. Choose a story that resonates with you, as it will likely resonate with audiences as well. Consider why this particular story connects with you emotionally and how you can make people feel the same way in your documentary film.
Next, consider your story’s historical significance. This is where your research begins. You may need to take time to learn about the context of your potential story. Some stories have never been covered, while others give us new ways to think about a subject. When choosing your story, consider the following questions:
- Do people know about the story?
- How important is the story, and why?
- What have people said about the story?
- What do people get wrong about the story?
- What do you want people to think after watching your documentary?
The next step is to evaluate the available resources. Sources are the building blocks of your documentary; without them, you cannot make a film. Not all sources are equal, so always seek out reputable ones. Sources can be a lot of different things. Some examples are:
- Photographs
- Videos
- Newspapers
- Recorded interviews
- Living people with connections to the story
When choosing sources, always consider the strengths and weaknesses of the collected materials.
Finally, if you believe you have enough sources to make your documentary, you must choose your documentary style. In choosing your style, consider the following:
- What style do you feel comfortable producing?
- What style will best convey the story in a way that will connect with the audience?
- What style will work best with the sources you have?
For examples of different kinds of documentary styles, see section three.
Once you've identified the available resources related to your story, you’ll need to make a plan for gathering them. It’s also best to have an organizational plan set up before you start gathering visuals and audio for your documentary. Make sure you have a way of naming files that clearly explains what each file is, so that you can easily find it later when putting together your first cut. For example, if you are doing a project with a set timeline, include dates in the file names to keep them in order. Organizing your resources from the beginning can save a lot of time later!
Here are some different types of resources and strategies for acquiring them:
Previously-Created Resources
Certain time periods will have better visual materials to include in your documentary. For example, it will be easier to find photographs after the 1900s. However, more recent pictures might be unavailable for use under copyright or behind paywalls.
When looking for pictures online, it’s important to use images with a resolution of at least 300 dots per inch (dpi). This ensures that you can zoom in on the pictures without too much distortion and that they can be projected on a large screen and still look crisp.
Ohio Memory and the Columbus Metropolitan Library’s My History page are great places to find images with clear permissions for use in research. Most other image databases will have permission and copyright information towards the bottom of the photo’s page, too.
When looking for newspapers, the Library of Congress’ Chronicling America is a great place to start. They have digitized newspapers from the 1700s all the way up through 1963. Not all newspapers are in this database. If you’re doing research on an event in a specific location, you can look for the state’s or city’s local history database, like the ones for Ohio listed above.
If you are using photographs or letters from an individual, make sure you get their permission to use the materials they shared with you in your documentary. Feel free to use this example release form to get permission to use these materials.
student-Created Resources
If you are going to do any filming on your own, such as oral history interviews or shots of historical places, there are some things that are important to consider:
- Good sound capture is essential for a polished documentary. Make sure voices are clear in interviews and background noise is kept to a minimum. Consider using separate devices to record audio and video.
- Most cell phone cameras capture great video, but keeping the phone steady is really important. Use a tripod or a gimble to ensure a steady shot.
- If you are planning to film a person or on private property, make sure that you obtain express permission from the person or people you are recording, or the property owner.
- When filming, also keep in mind the Rule of Thirds. If you were to divide the screen into three sections, make sure your subject, whether an interviewee, a building, or an object you’re featuring, is kept on one of these lines. This keeps your shots balanced yet still visually interesting:
Oral histories
Oral history interviews are a great way to get first hand information from the time period you’re researching and to include multiple perspectives in your documentary. You can find National History Day’s advice on oral histories here.
When you conduct interviews, it is important to break the ice with the interviewee. Start your recorded conversation with easy background questions like their birthday, where they’re from, and who their family is. As you get deeper into the interview, remember to ask how and why questions to get full, meaningful answers. Try to avoid yes or no questions.
During your conversation, don’t feel pressure to fill silences. If your interviewee pauses after finishing a sentence, give a polite, brief response and count to five in your head. More often than not, the person you’re interviewing will continue talking.
If you need additional resources or are curious about oral history interviews, check out the Oral History Association and Baylor University’s Institute for Oral History.
Once you’ve gathered your sources, you’ll need to think about how to build your argument. Your “argument” is more than an observation or a fact. Instead, an argument is a well-reasoned position. A good test of whether you have an argument (instead of just a fact) is if a reasonable person could disagree with it. Here’s an example:
Fact: A group of Black mothers and their children marched in Hillsboro, Ohio, to integrate the elementary schools.
Argument: The Black residents of Hillsboro, Ohio, were a crucial part of the school integration movement after the Brown v. Board of Education decision to end school segregation.
Although it would be hard, if not impossible, to reasonably disagree with the recorded actions of a group of mothers and their children, it’s possible to disagree with the second statement, as long as you can support your position with reasons and evidence.
The next step is to add reasons for your position. To help you build these reasons, add “because” to the end of your main claim/argument: “The Black residents of Hillsboro, Ohio, were a crucial part of the school integration movement after the Brown v. Board of Education decision to end school segregation because…”
Then you’ll need to develop several specific reasons that support your argument:
“The Black residents of Hillsboro, Ohio, were a crucial part of the school integration movement after the Brown v. Board of Education decision to end school segregation because they were among the first people to test the limits of the Supreme Court decision.”
This statement will function as the main position, or thesis, of your project. It’s usually good if this appears early in your project. The body of your project will support your thesis by fully explaining your reasons and the evidence (or specific facts) for them.
Documentary Styles
A key part of presenting your argument is your documentary style. As you plan your film project’s organization, consider some of the common ways that documentaries are organized:
- Poetic: The goal of poetic organization is to evoke a feeling rather than to explore a truth. This style of documentary will use experiences and images instead of a straightforward narrative. How can you help your viewers see the world through another person’s perspective?
- Expository: The goal of expository organization is to inform or persuade viewers about a topic. This kind of organization most closely follows what you might find in an academic essay with a main point/thesis and several supporting claims. Stylistically, the narrative is straightforward and uses clear language.
- Observational: The goal of the observational organization is to document the world with little interference from the filmmaker. Rather than staging interviews or re-creating scenes, this style of documentary tries to offer readers access to real-life events.
- Participatory: The goal of participatory organization is to include the filmmaker within the narrative. Your involvement can range from hearing the filmmaker asking questions from behind the camera to having the filmmaker become a major part of the narrative and even influencing the actions of the subjects.
Before editing, you must create your documentary script or storyboard. A storyboard is a visual representation that filmmakers use to organize the flow of their documentary images.
The storyboard lets you lay out the documentary’s story before starting. Arrange your images and other sources in order of how you plan to use them in the documentary:
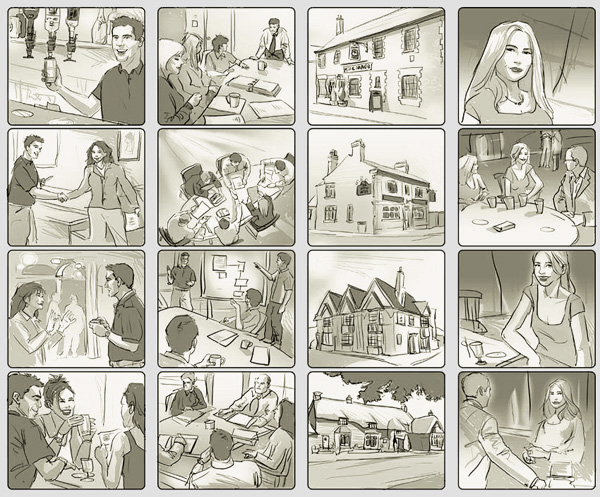
File:Storyboard example.jpg - Wikimedia Commons
As you create your storyboard, ask yourself the following questions:
- Will this arrangement allow me to tell the story in a way that will connect with the audience?
- Are there any holes in the story?
- Do you need to collect more sources?
- Consider what transitions you might use between sources.
Only begin working on your film after first creating an outline, script, or storyboard. Planning will save you headaches later!
Cuts & Transitions
Consider what kinds of transitions or cuts you might want to use as you look at your storyboard. New filmmakers often overlook transitions and cuts, but they are essential to a good film and should be considered carefully. For a list of different types of transitions and cuts that you may want to use in your documentary and to see examples, please visit the following link: 9 Essential Cuts Every Video Editor Needs to Know (shutterstock.com). You can also watch the following YouTube video for more examples of cuts and transitions: Cuts & Transitions 101.
An important cut to know about for your filmmaking as a documentary filmmaker is the Ken Burns effect. Ken Burns is noted documentary filmmaker who popularized an editing technique that has become popular amongst documentarians who work with photographs.
The Ken Burns effect describes how a still image can be moved within the frame of the video. The video can pan over an image or zoom in and out. This effect allows you to highlight important elements in the image.
When using this effect, keep the following things in mind:
-
- Choose meaningful images. Each image you use should add to the story in some way.
- Make sure the details of the image are clear and high enough resolution that details can be seen by the viewer.
- Move slowly! When panning or zooming across the image, do not move the camera too quickly. Give the viewer time to absorb the information being conveyed by the image.
- Change things up. Try not to pan or zoom over the images the same way.
Text and graphics are an important part of any documentary. You need to label photographs, speakers, and locations. You need title cards and credits. And you need your documentary to be eye-catching.
In general, if you are putting texts or graphics into your documentary, they are going to go in what filmmakers call the Lower Third. Like the Rule of Thirds discussed in section two, this idea divides a screen into thirds. Generally, all of your text and graphics should go in the Lower Third so as not to distract from the visuals on screen.
Any time there is text on screen there are five important things to consider:
- Size: Your font can’t be too big or too small. Test your text on various screen sizes to see how it appears. The text will look different on your computer compared to on a projector screen.
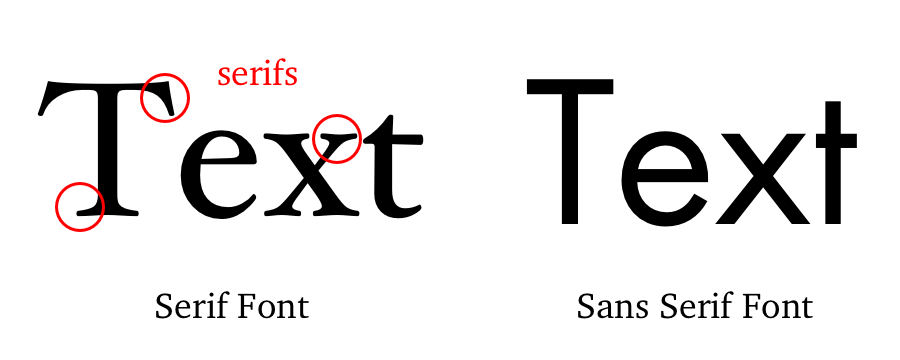
- Font: Your font choice should match the tone of your project and be readable. Generally, stick to sans serif fonts with distinct letterforms:
- Backgrounds: Make sure your text stands out from the background. A common standard is white text with a drop shadow to make the text distinct, but you should experiment to see what looks best for your project.
- Margins: Make sure there is enough space between your text and subjects on screen. Your text shouldn’t go on top of the focus of a shot. Also, it is important to make sure that your text is far enough from the edge of the screen that there’s no risk of it getting cut off when seen in a different format.
- Read time: Don’t make your text move too quickly. People read text in film more slowly than text on paper, since there’s additional visual information on screen. Read time is something you should test with others.
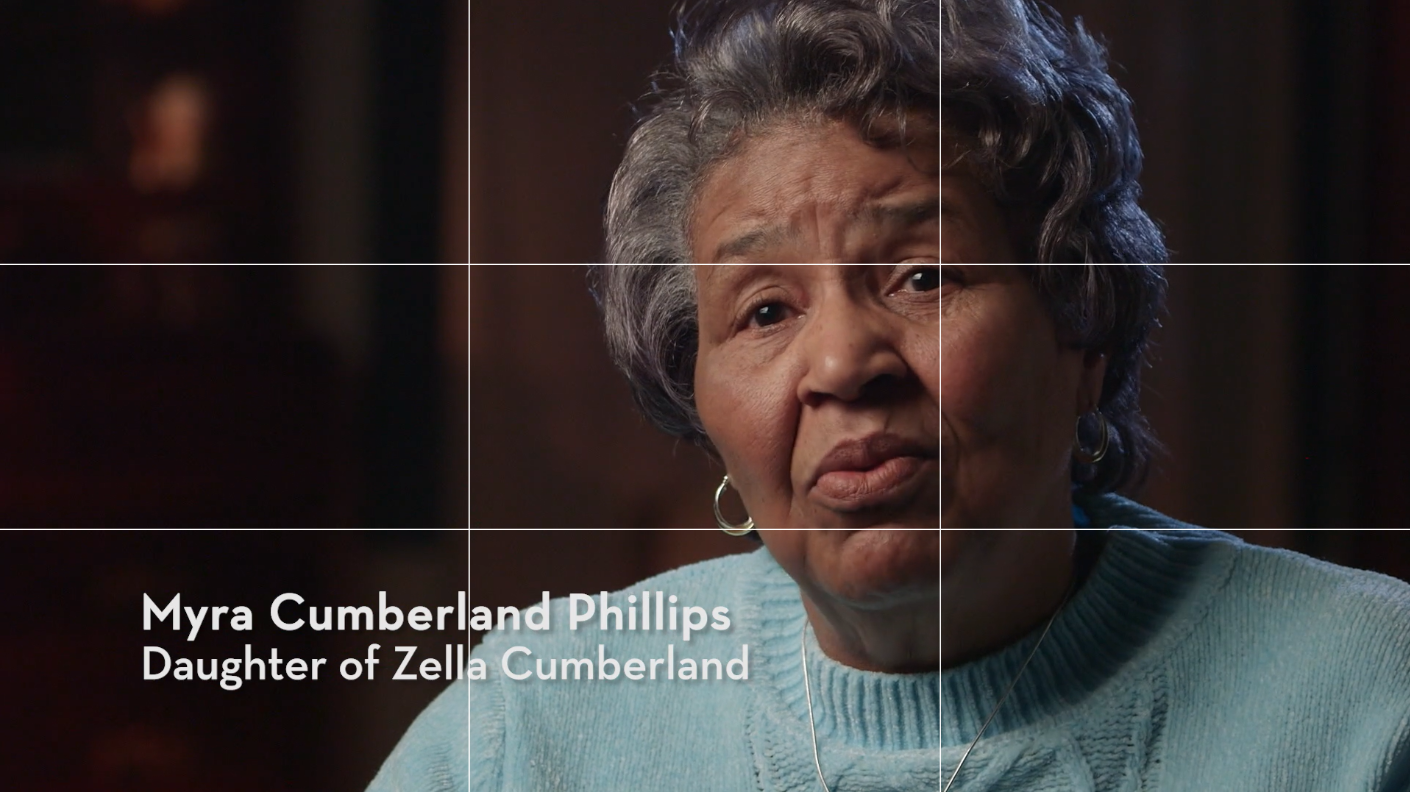
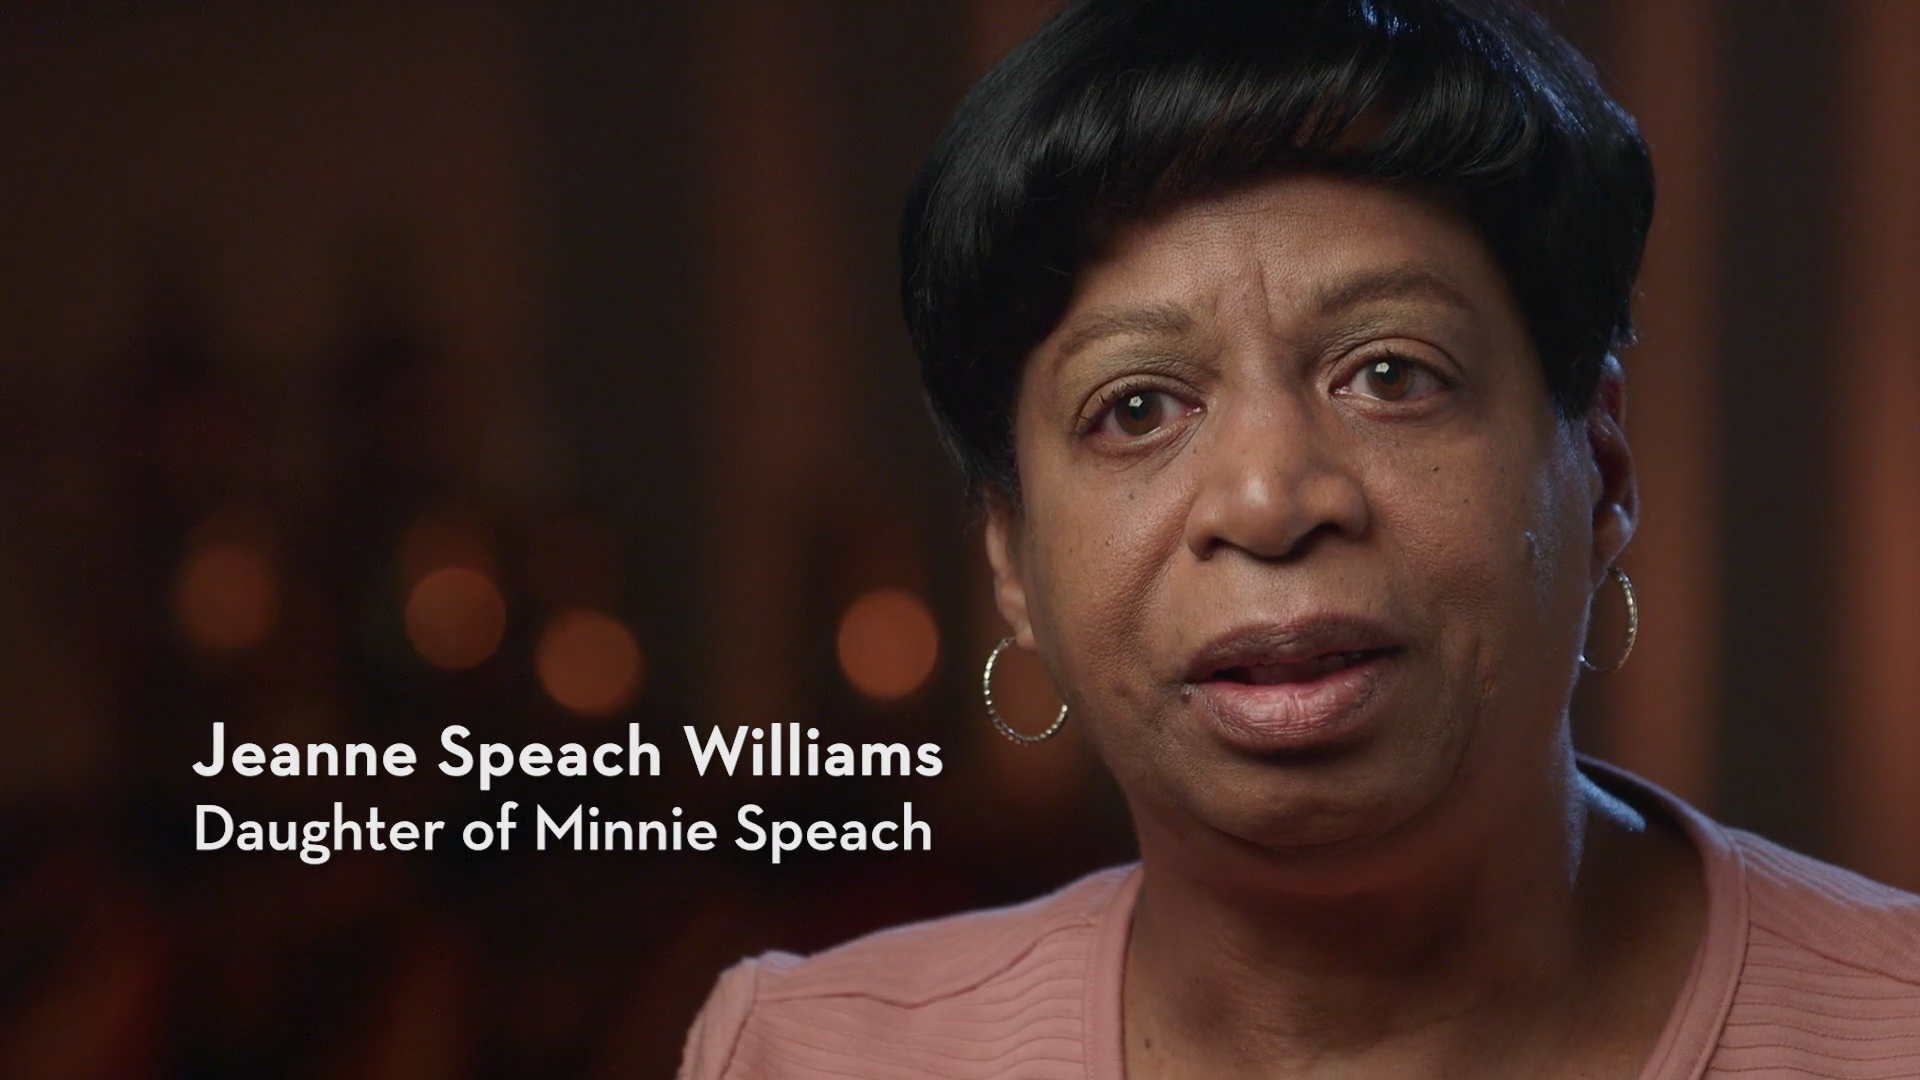
When you’re labeling interviewees, photographs, locations, or anything else on screen, your label should reflect pertinent information to the story. For example, in our documentary The Lincoln School Story, the interview subjects are daughters of prominent figures in the school integration movement in Ohio. When adding text to the screen during their interviews, we made sure to include their mother’s names so that audiences can see the direct relationship between the mothers' actions in the 1950s and the present day:
Once you have a cut of your film that you’re happy with, you'll need to edit and refine it to make your film the best it can be. Your first cut isn’t going to be your best one. It might be your second, or third, or fourth. Save different versions of your film if you’re unsure about changes you’ve made, and ask people to compare them. Getting feedback is an important part of editing and revising your film.
Asking people to watch your film part way through the creation process can be intimidating, but it’s crucial to make sure you’re getting your point across in a coherent, appealing way. Prepare your audiences to offer critiques when they see your film:
- Sound and Visuals—How does the film look? Does it sound okay? Is the text clear and readable? Is there too much text or too little? Do images or text move too fast?
- Narrative—Does your story come across well? Does the audience feel like they’re missing something? Does the editing support a narrative flow?
- Argument—Does your voice as a filmmaker come through? Can the audience get a sense of your own analysis? Are there multiple perspectives included?
Show your film to as many people as you can! Fellow student filmmakers, parents, teachers, and people unfamiliar with your project will all have different perspectives on your film and different suggestions to improve. Since you won’t be able to answer content questions about your project at the competition, this is the time to make sure that your story and argument are complete and well presented.
Finally, be gracious when you receive feedback. People will be watching with the intent to help you improve. Ultimately though, you are the filmmaker and researcher—it is up to you to decide if certain changes aren’t feasible or don’t work with your vision. Take notes on critiques and watch your film again with those notes in hand. See if you can see what others have seen, and decide if it’s something that needs to be fixed.
Once you have finished editing and revising your documentary, you will need to save your project as an MP4 file and compile and save any written materials as a PDF. These will then be uploaded to your contest’s registration site. Visit the Ohio History Day website for more information, including contest rules, evaluation rubrics, sample projects, and participant and submission guidelines.
Ohio History Day also provides several resources to help you organize, research, and develop your project.